-
Everybody has a hobby. Some loves to cook to relax themselves, others keeps drawing until they can barely stand up because of non-comfortable drawing position... And then there is my father. Who loves sculpting wooden spoons.
Yeah, you read that properly : his new passion consists in sculpting spoons from pieces of wood he picks up. At the beginning, it was just a small hobby, but these weeks, it took a new scope : my garage's floor is constantly covered by wooden chips, he bought professional equipment aaand we are now the happy owners of about twelve brand new spoons.
So.
If I tell you about this, that's because among all the professionnal stuffs my father bought, there was this :
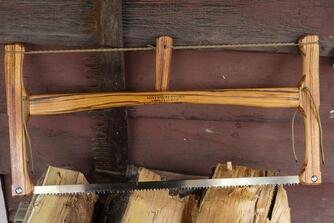
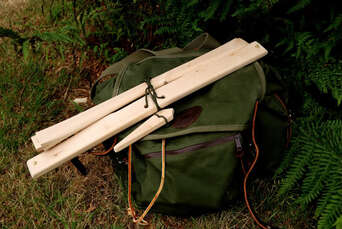
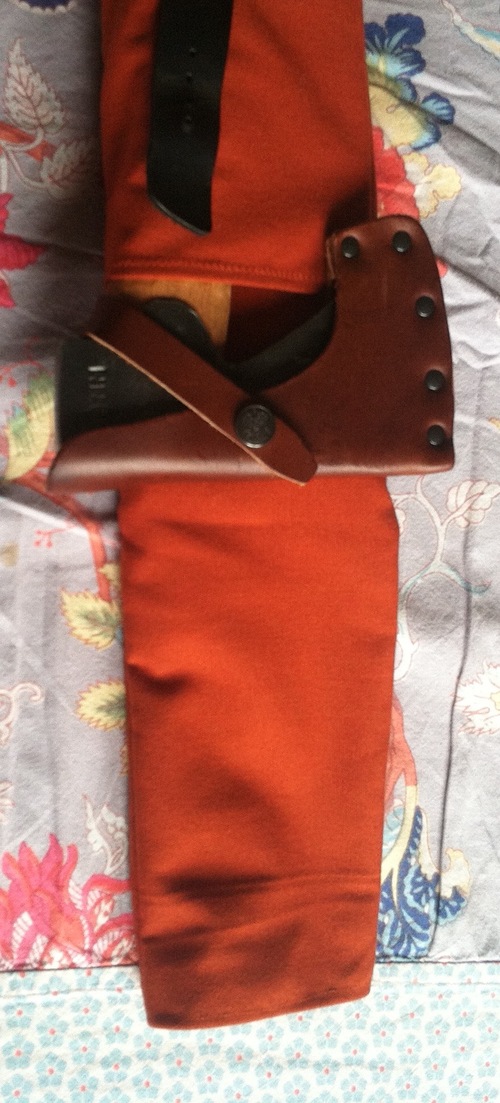
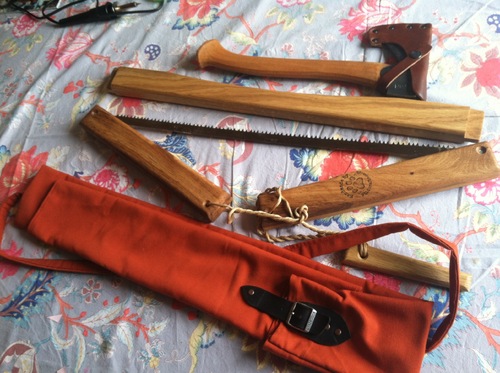
It's called a "buck saw", and it's a sort of portative saw (left : unfolded, right : folded).
And, as his birthday was approaching, he asked me to make him a case to tide it in, where we could add an axe. The only base I had was this picture :

And yeah, OBVIOUSLY, I forgot to take pictures as I was making it. Again. So, this time again, you'll have to deal with laborious explanations and pictures of... the finished object. But, lucky you, I made drawings to help you understand.
WELL. First, what did I use ? You'll need, if ever you wish to reproduce my marvellous work :
- Some solid fabric
- Some thread (same color as the fabric)
- A sewing machine
- Some rivets (the metallic stuffs on your jeans)
- A piece of leather and a buckle (from a belt or, as I did, from an old shoe)Let's go.
• First, I analyzed the object. You need to notice a few things :
1) The base of the case is a cylinder that wraps the Buck Saw while maintaining the two parts tight
2) When you put the saw in it, it exceeds fifteen twenty centimeters from the saw. This length is to be pulled back over the head of the axe, and to be closing the case by the same way.
3) A second piece of fabric is sewn over a half of the cylinder : that is where you put the handle of your axe.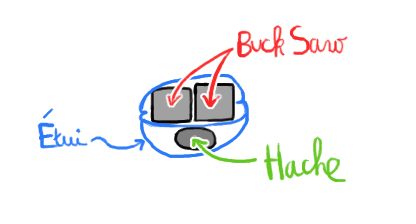
If we made a transversal cut of the whole thing, it would look like that. (Hache = axe, Etui = case)• Then, I took some measurements : the girth of the two pieces of the saw to wrap, their height... Then, from this, I cut off two pieces : a big rectangular one which will be the base, and a smaller one, rectangular too, which will wrap the axe. It looked approximatively like this :

(longueur de la bucksaw/du tour de la BS = length of the buck saw/of the girth of the BS ; hauteur = height)
• Puis j'ai ourlé certains bords pour ne pas qu'ils s'effilochent :
• Then I hemed some edges in order not to let them unravel

The nice hems are the ones you'll see at the end, the ugly ones will be hidden.
(ourlet moche = ugly hem ; bel ourlet = nice hem)• Then, I sewed the small piece on the big one. Be careful, this sewn is pretty complicated to visualise :
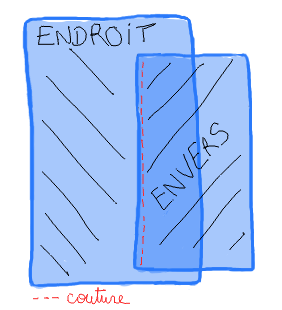

(ENDROIT = RIGHT SIDE ; ENVERS = REVERSE SIDE ; couture = sewn)
The second picture shows the small piece folded over the big one across the sewn. On my picture, you can see the sewn because I made the fabric transparent, but in reality it is hidden by the small piece (and on the 2nd pic you see the right side of it)
• After this, I folded the whole thing in two, right side against right side, and I sewed on the reverse side the three edges of fabric together to close the case.
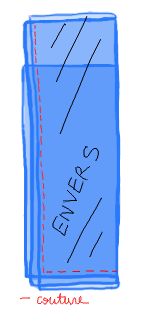
(ENVERS = REVERSE SIDE ; couture = sewn)
Then, I turned it inside out like a sock.
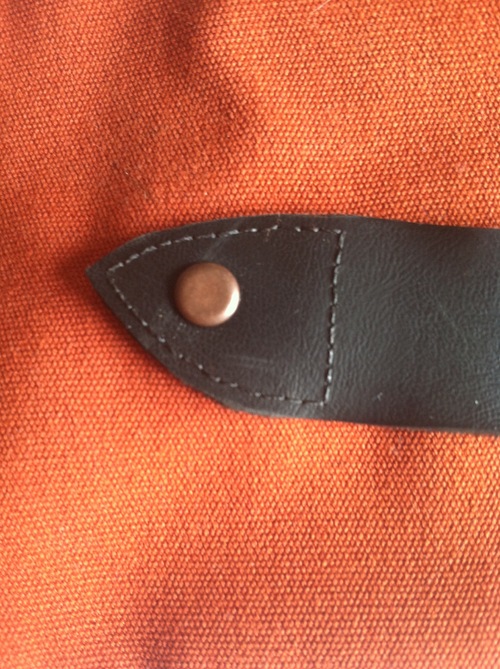
• Next step : sew the closing part. Like in the original picture, my strap is made of leather, but I is closed by a metallic buckle (the one I picked on the shoe). I cut my strap on the shoe with a cutter, to give it a nice shape, then I rubbed it a bit with sand paper to soften the edges.
• Then, I sewed the two parts of the strap where I had to put them. To find the right place, I put the saw and the axe in the case, I pulled back my exceed of fabric (the 20 centimeters-long one). There, I placed the two parts of my strap and I marked the place with a pencil (make it discreet). Then I pulled the saw and the axe over and I sewed.
Let me tell you one thing : sewing leather is very, very hard. I had to improvise : I made holes in the leather, at a regular distance, with a rather thick needle, and then I sewed with back stitches in the holes I made before. It was rather clean. For one of the two pieces of leather, I was fed up with carefully sewing so I made two "clean" lines of stiches and I fixed the rest with ugly stitches on the reversed side, that we couldn't see on the right side. This isn't very clear, sorry ^^
After all that, I placed some rivets in the leather to be certain that it was properly fixed (and because it looked good).

(Au passage : envers d'un bel ourlet = by the way : the reverse side of a nice hem
Belle couture = clean stitches
Couture moche = ugly stitches)• Eventually, I made a fabric shoulder strap (in order to wear the case in one's back). To do this, I took a large strip of fabric, I folded it in two and sewn the edges a first time, then I flattened it and I folded in two again, and sewed a second time. I tied it on the case with two rivets at each side. For the length of the shoulder strap, I made a few trials on my dad for it to be well adjusted.
Then, I finally got a great buck saw case, very useful and good-looking :
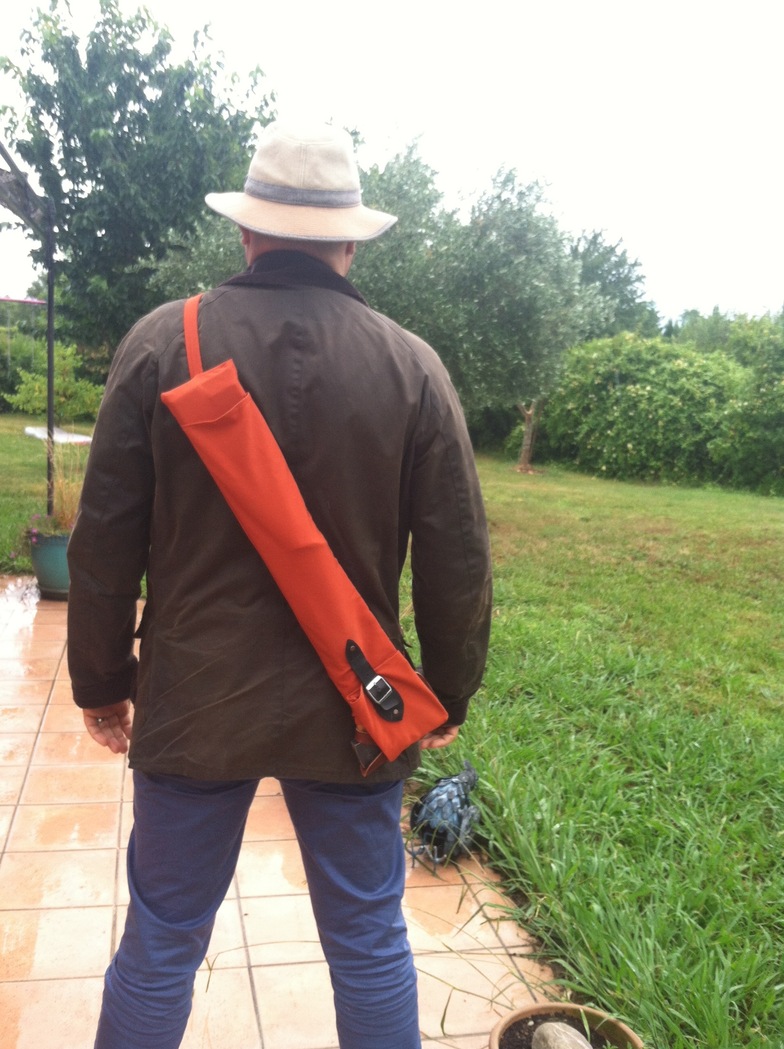
And my Dad was very happy ! Now, he can take his bushcraft equipment everywhere to get some wood in the forest or the countryside. ^^
 2 comments
-
I motivated myself to participate in a drawing contest proposed by this blog : Draw - Apprends à dessiner ! This month's theme (April, 2016) was "Black and white : draw without using any other shade than black and white ! No grey allowed !"
I sent my participation, and then, I put a grey backgroud using GIMP, because I thought it looked nicer.

It was a good exercise to work on my profiles (I don't master them as well as the face-front faces or as the 3/4 ones), and I'm proud of the result ! I like the boy in black. Think about the fact that I spent HOURS coloring the whole black part with my inking markers. It was very long ^^
I finally ended up third over six contestants. I won 31 points, knowing that the first one got 34 points and the last ones, 26. I won't lie to you : I was a bit disappointed, but I reckon that the drawings which beat mine were totally worth it. You can see them here, with the details of the contest (that will be in French, sorry guys) : Black and White contest
So, what are you thinking of that ?
 your comment
-
A few days ago, it was New Year's eve (what a big scoop). As I invited my friends, I decided to make a nice "animation" : a Photo Booth !
It's a well-decorated place, with proper lightening, where you can take cool photos to keep a memory of the party. Actually, I didn't make any decorations, but I did worked on the accessories !
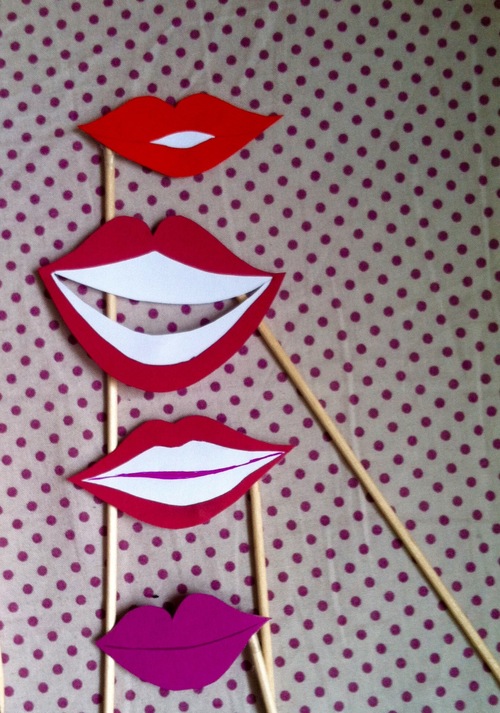
I saw a lot of pictures with fake glasses, moustaches and all... And I heard that you could buy them, but it was expensive and a lot less funny that doing it myself. So I decided to make my own paper accessories kit !
The equipment is easy to find : all you need is good scissors, a cutter, some scotch, some colored cardboard paper and very long wooden skewers.
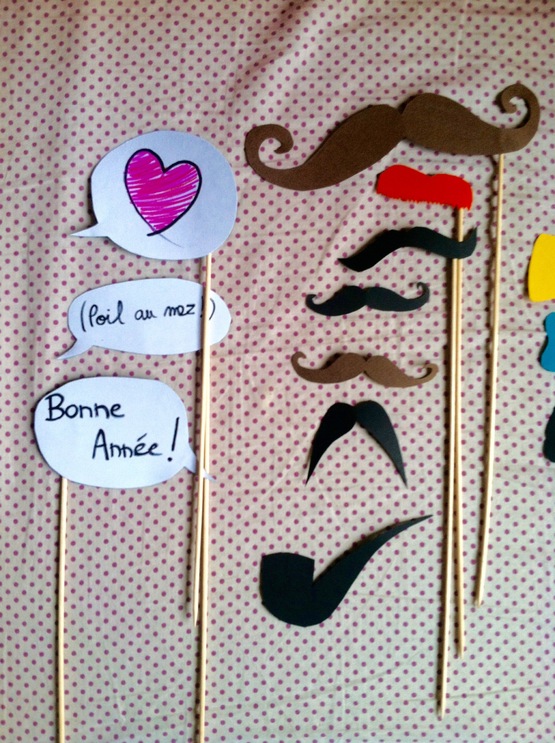
Then, still very easy : you just have to draw your different shapes with a pencil, then you cut them and you stick them to the skewers witch the scotch ! After one hour, here's what I could get :
All the ideas are not mine, I inspired myself from what I found on Internet (just type Photobooth paper kit on Google).
The result on my friends have been great, I now have tons of super cool pics from the party !
 your comment
-
Today, I'll give you a cool and cheap idea of DIY : mug customization. There are LOTS of it on Internet, so I felt like trying this out (plus, I had a fun gift idea to find for Melsaan).
You don't need a lot of things for this tutorial :
- Some POSCA markers, again, which are pretty expensive but last for long (I haven't counted them in the price since I already had them)
- A mug to customize (between 2 and 4 €, internet or creative stores)
- Some toothpicks
- Absorbant paper
- An oven
And that's all ! (at least for my version)
So ! Time to start.
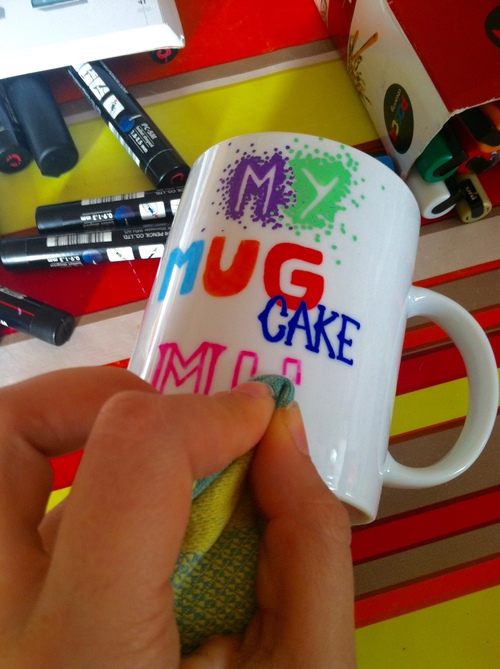
First, you should do some trials on a random paper before actually customizing the mug. This way, you'll find the good font, the best way to place the letters, etc... I decided to write "My mug cake Mug", because Melsaan and I love mug cakes (cakes cooked in the microwave, in a mug)
This is when we really start. I alternated the fonts and colors to give it a nice look.
You may use a flexible paper as a ruler, but DON'T do as I did on the pic : don't let your line touch the paper, otherwise the ink could leak...
A small mistake, an ugly letter ? You can erase it with a humid towel.
Uh, rectification : you can erase with humid ABSORBANT PAPER. The Posca make stains on the towels. Veeeery hard to remove !
Here's another tip ; you can rectify your lines (not straight enough, ugly little bumps on the edges of the letters) with a toothpick ! Once the ink is dried, just scratch with the tip and the ink will be erased easily. You can also use this tool to add some decorations by emptying several zones, as I did on the M and the U.
This tool is also useful to make the shadows look better : if you use the toothpick to get the shadow tip thinner, if follows the curve of the letter instead of ending up as an ugly big thing.
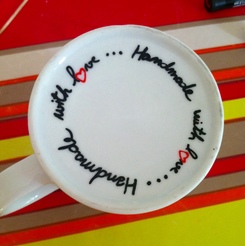
On the bottom of the mug, I wrote "Handmade with love". For the heart, I first drew an entire heart before emptying it with the toothpick once dried. Careful : you must let the black ink dry before adding the red one, otherwise the colors will be mixed together !
Here's the small word I wrote on the handle...
And the back of the mug's design. It's our basic mug cake recipe ;D
And here's the result of the front face ! (Yes, the final pic is blurred, please congratulate me)
Now we just have to put it in the oven for 30 minutes at 220°C for porcelain and at 160°C for ceramic.
After baking, the pattern resists to water, but you'll have to wash it with cold water and the soft side of your sponge in order to keep your masterpiece intact. Some people say that the oil-based Sharpie Markers are lasting better after baking. I haven't tried them yet.
That's all for today ! Bye !
 your comment
-
J'avais commencé un nouveau bracelet tout en tons de blanc, qui dans ma tête irait très bien avec ma peau hâlée par l'été. Sauf que voilà, moi et les plannings ça fait quatre, du coup je l'ai fini... Il y a un mois.
At the beginning of summer, I started a new Hipanema-like bracelet, all in white and silver shades, that was supposed to fit perfectly with my tanned skin. But you know, me and schedules are not best friends, so I actually finished it... One month ago.


So, what do you think ? If you want a small tutorial about how I made all the bracelets, please tell it in the comments !
 your comment


